One of the best things about Jeep’s JK’s is the unbelievable amount of customization that is available, either buying aftermarket equipment or doing your own mod’s in your garage. When I first bought my JKU, I like many others trolled through aftermarket catalogs, websites and forums looking at all the cool things you can do, and one that so many do is replace the OEM fenders. Replacing/modding the fenders does a couple of things, one being adding more clearance for the incredible amount of wheel travel JK’s have, and second it just looks cool. After a year or so looking at what others have done, I decided that cutting the OEM fenders was the way to go. I mentioned this to my wife Colleen and she was shocked that you could even do this and was worried that it would just look horrible. Then in January (2014), Colleen and myself had the pleasure of doing a ride with the Wayalife crew (2014 WAYALIFE Kick-Off Run), and Colleen got to see some of the best Jeeps in the Southwest and saw that most had cut OEM fenders, she was sold. Since then I have been researching and planning my own cut job.
Then, I met Scott Hurd (saddletramp) on the Wayalife forums and had the pleasure to meet up and eventually do a ride with him. Scott had done probably one the best cut jobs on a JK I have seen to date and he offered to help me cut mine… it was on! Here are some images and steps we took to cut my OEM fenders. Hope this helps anyone looking to do their own.
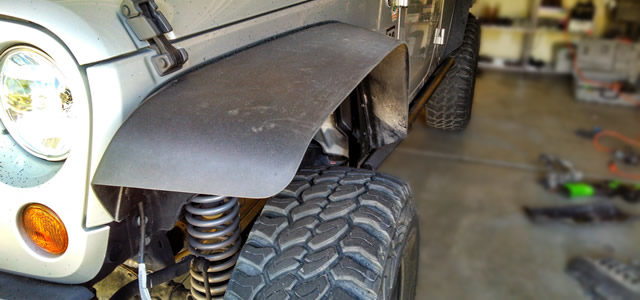
Here’s a couple of images as reference to what the fenders looked like before I started.


Time to Mod
Using some painters tape, run it where you want to cut your fenders. We chose to stay close the the edge just before it curves down. If you make it to narrow it may be hard to get the OEM brace (front fender) underneath to fit. You should have this removed already along with the OEM fender wells (tubs). You can cut these to fit back in afterwards. I will not be putting the rear ones back(tubs), but may do a modified front to help protect items on my firewall from getting hit with rocks and such, not to worried about water as I live in the middle of the Mohave desert and rain is not an issue.


Then it’s time to cut, we used a jigsaw and just ran the tape line.

To get the bottom angles (front and back) we applied science (and a freebie phone app) and held the phone at the angle we liked and put a piece of painters tape to hold the line, we chose this angle to match the angles on my EVO rock sliders… You should choose what you feel is best for your’s.

For the front side of the front fender we decided to follow the factory line and just measured up 4 1/4″ and set our line there.

Here we again apply science to create the radius. You will have to remove the front fender clip and pull it out a little to make the cut, this is were an extra set of hands comes in handy.

Finishing touches… You can never make a super clean cut with the jigsaw, so this is where the secret weapon comes in. Use a Drywall Rasp to smooth out the cuts and make your lines as straight as an arrow, then follow up with a sanding block to smooth it out to perfection. also a good time to round off you angle cuts (I did just a slight rounding), or leave them straight for a straighter look.

You also need to modify the brace under the front fender… First image shows where I cut the front off and the second shows where I cut the back (dashed lines). You also need to cut off these brackets (not needed anymore), and I used a Dremel to remove all the burrs and smoothed out my cuts to a factory look.


Here are some images of the final product.


That’s about it, I hope that some of this may help you out on your project… Make sure you look around the internet for as many tips as possible, on forums, websites and youtube of other cut jobs.
Here are some cut links;